
Introduction
I’ve been making mac and cheese for as long as I can remember, but this version—rich, creamy, golden, and baked to perfection—is the one that finally made everyone stop and ask for the recipe. I still remember the first time I served it at a family dinner. I had just finished grating an unreasonable amount of cheese, and the sauce was bubbling gently in the pot. I combined it all, baked it until the top was golden and slightly crispy, and set it on the table. Everyone went quiet after the first bite—always a good sign. Since then, this baked mac and cheese has become a staple in my kitchen. It’s indulgent, but not over-the-top. It’s cozy, reliable, and always a hit with guests, kids, or anyone needing a little edible comfort.
Why you’ll love this recipe:
Versatile
This mac and cheese can be served as a main dish, a hearty side, or even dressed up for special occasions. Add vegetables like broccoli or spinach, or mix in proteins like shredded chicken or turkey bacon. You can even prepare it in individual ramekins for elegant presentation.
Budget-friendly
The ingredients are simple, affordable, and easy to find. Most people already have pasta, butter, flour, and cheese in their pantry or fridge. It’s an economical dish that feels like a splurge without draining your wallet.
Ingredients for the recipe
-
12 oz elbow macaroni (or pasta of choice)
-
3 tablespoons unsalted butter
-
3 tablespoons all-purpose flour
-
3 cups milk (whole milk or 2% preferred)
-
1 cup heavy cream
-
1 teaspoon salt
-
1/2 teaspoon black pepper
-
1/2 teaspoon garlic powder
-
1/2 teaspoon mustard powder (optional but recommended)
-
3 cups shredded cheddar cheese (divided)
-
1 cup shredded mozzarella cheese
-
1/2 cup grated parmesan cheese
-
1/2 cup breadcrumbs (optional for topping)
-
1 tablespoon melted butter (for mixing with breadcrumbs)
How to make this recipe
Step-by-step instructions
Begin by preheating your oven to 350°F (175°C). Lightly grease a 9×13-inch baking dish with butter or non-stick spray and set it aside. This will ensure the mac and cheese doesn’t stick and makes serving easier.
Bring a large pot of salted water to a boil. Add the elbow macaroni and cook until just al dente, about 1 minute less than the package directions. You don’t want the pasta too soft, as it will continue cooking in the oven. Once cooked, drain it and set it aside.
In a large saucepan or deep skillet, melt 3 tablespoons of unsalted butter over medium heat. Once the butter is fully melted and bubbling slightly, add 3 tablespoons of all-purpose flour. Stir constantly with a whisk or wooden spoon for about 1 minute to form a smooth roux. This helps remove the raw flour taste and thickens the sauce.
Slowly pour in the milk, about 1 cup at a time, whisking continuously to avoid lumps. Once the milk is fully incorporated, add the heavy cream. Keep whisking as the mixture begins to warm and thicken—this should take 3 to 5 minutes. Stir often and don’t rush this step; a silky, thick base makes all the difference.
Once the sauce begins to thicken and coats the back of a spoon, season it with salt, black pepper, garlic powder, and mustard powder. Stir well, then reduce the heat to low.
Now it’s time for the magic: slowly add in 2 cups of shredded cheddar, all of the mozzarella, and the grated parmesan cheese. Stir constantly as the cheese melts into the sauce. This will give you a velvety, rich cheese sauce that’s absolutely irresistible.
Once everything is fully melted and combined, pour the cooked pasta into the sauce. Stir gently but thoroughly, making sure every piece of pasta is coated in cheesy goodness.
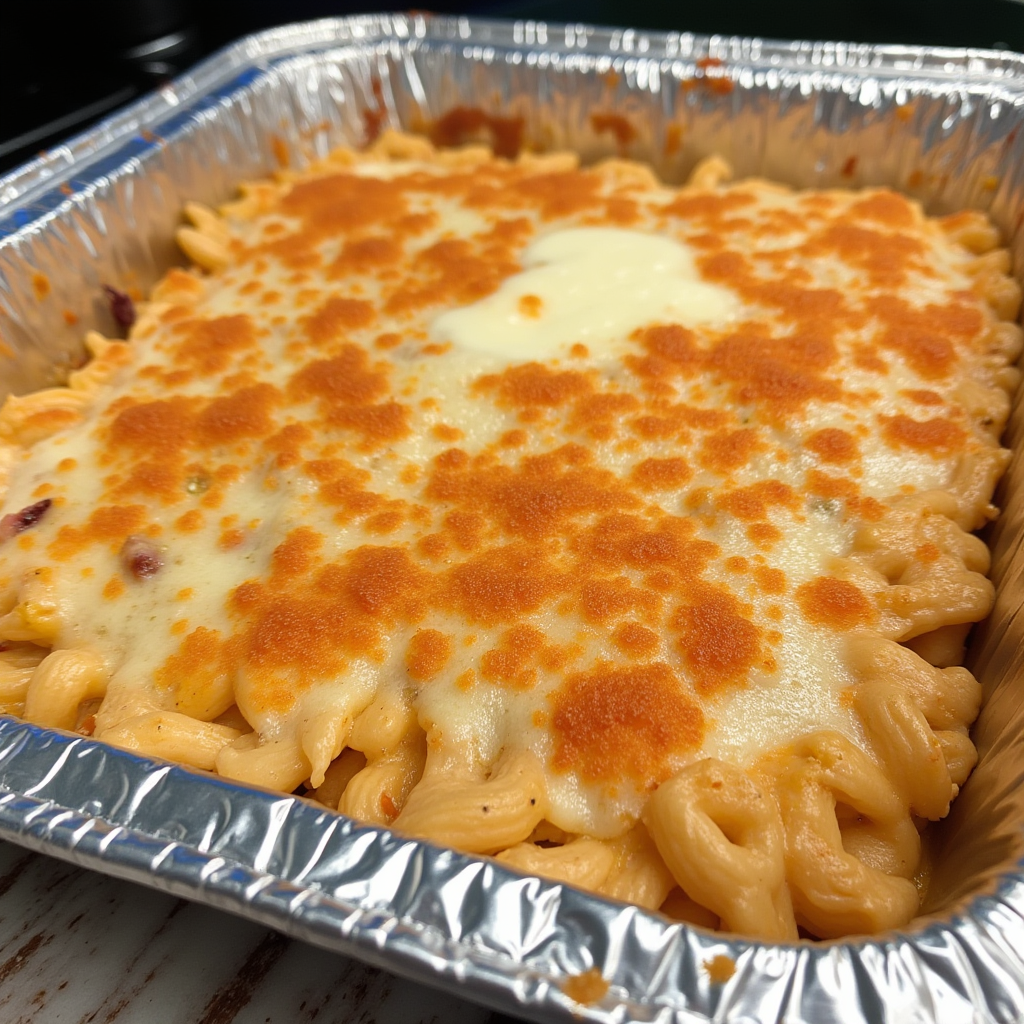
Transfer the mixture into your prepared baking dish. Sprinkle the remaining 1 cup of shredded cheddar evenly over the top. If you’re using a breadcrumb topping, mix 1/2 cup of breadcrumbs with 1 tablespoon of melted butter in a small bowl and sprinkle that over the cheese layer. This gives a golden, slightly crunchy crust.
Bake uncovered for 20–25 minutes, or until the cheese on top is melted and bubbly and the edges are just beginning to brown. If you want an extra-crispy top, you can broil it for 2–3 minutes at the end—just keep a close eye on it to prevent burning.
Remove the baking dish from the oven and let it sit for 5–10 minutes before serving. This resting time helps the sauce settle, making it easier to scoop and even creamier with every bite.
Quick and easy
This recipe might sound indulgent, but the steps are surprisingly quick. Using a roux-based sauce means you don’t need to rely on pre-made mixes or artificial flavors. Everything is made from scratch in under an hour. Cleanup is easy too—one pot for the pasta, one pan for the sauce, and your baking dish. You can even prep everything in advance and bake it when needed.
Customizable
You can easily adapt this recipe to fit your preferences. Add cooked turkey bacon, grilled chicken, or steamed broccoli to the cheese sauce for a heartier version. If you want to sneak in veggies for kids, finely chopped spinach or grated carrots mix in beautifully without overpowering the flavor.
Prefer a bit of spice? Stir in a pinch of cayenne pepper or a few dashes of hot sauce to the cheese sauce. You can also experiment with cheese blends—sharp cheddar, gouda, gruyère, or Monterey Jack all melt wonderfully and bring their own twist.
Gluten-free? Use gluten-free pasta and replace the flour with a gluten-free thickener like cornstarch or a gluten-free flour blend.
Perfect for guests
Creamy baked mac and cheese is one of those rare dishes that everyone loves. It’s nostalgic, filling, and always welcome at potlucks, family dinners, and holiday tables. You can prepare it in advance, refrigerate it overnight, and bake it right before guests arrive. It reheats well, so leftovers are never a problem—in fact, they’re often fought over.
For a fancier presentation, serve the mac and cheese in individual ramekins or mini baking dishes. Top each with a sprinkle of extra cheese or breadcrumbs and bake as usual. It’s impressive, portion-controlled, and makes everyone feel a little extra special.
FAQs (Frequently Asked Questions)
Can I make this recipe ahead of time?
Yes. You can fully assemble the mac and cheese, cover it tightly, and refrigerate it for up to 24 hours before baking. When you’re ready to bake, let it sit at room temperature for about 20 minutes, then bake as instructed.
Can I use different cheeses?
Definitely. You can mix and match cheeses to suit your taste. Try using Monterey Jack, Colby, Gouda, or Gruyère for extra flavor. Just make sure the cheeses you choose melt well.
How do I prevent the sauce from getting grainy?
Always melt the cheese over low heat and never let the sauce boil. Using freshly shredded cheese instead of pre-shredded helps, since pre-shredded cheese often contains anti-caking agents that can affect texture.
Can I use a different type of pasta?
Absolutely. While elbow macaroni is classic, you can use shells, cavatappi, rotini, or penne. Just make sure the pasta shape holds the sauce well.
What can I serve with mac and cheese?
It goes great with a crisp green salad, roasted vegetables, or grilled chicken. It’s hearty enough to stand on its own but also complements many side dishes.