
Introduction
I still remember the first time I made Japanese katsu at home. I was craving something crispy, comforting, and full of flavor—but takeout wasn’t in the cards that night. So I rolled up my sleeves, grabbed some chicken breasts, and got to work. When I plated everything—crispy golden cutlets, fluffy white rice, a tangy homemade Tonkatsu sauce, and crisp shredded cabbage—I knew I was onto something special. One bite was all it took: juicy chicken, crunchy coating, savory-sweet sauce—it was love at first crunch. Since then, these katsu bowls have become a go-to recipe in my kitchen whenever I need something satisfying, but not overly fussy.
They’re the kind of meal that makes you feel like you’re dining out—even if you’re still wearing pajama pants. And the best part? They’re surprisingly simple to make, totally customizable, and way better than anything from a frozen box.
Why you’ll love this recipe:
Versatile
These katsu bowls work for lunch, dinner, or even meal prep. You can make them with chicken, turkey cutlets, or even tofu for a meat-free version. Serve with rice, noodles, or shredded salad greens.
Budget-friendly
Basic pantry staples and affordable ingredients make this a great low-cost recipe that doesn’t skimp on taste. No fancy tools or specialty items required.
Ingredients for the recipe
For the katsu:
-
2 boneless, skinless chicken breasts (or turkey cutlets)
-
Salt and pepper, to taste
-
1/2 cup all-purpose flour
-
2 large eggs, beaten
-
1 cup panko breadcrumbs
-
Vegetable oil, for frying
For the Tonkatsu sauce:
-
1/4 cup ketchup
-
2 tablespoons Worcestershire sauce
-
1 tablespoon soy sauce
-
1 tablespoon sugar
-
1 teaspoon Dijon mustard
-
1/2 teaspoon garlic powder
For the bowl:
-
2 cups cooked white rice (short grain preferred)
-
1 cup finely shredded green cabbage
-
Optional: sliced green onions or sesame seeds for garnish
How to make this recipe
Step-by-step instructions
Start by preparing the chicken. Lay the chicken breasts flat on a cutting board. If they are thick, slice them in half horizontally to create thinner cutlets. You want them about 1/2 inch thick. This helps them cook quickly and evenly. Pat them dry with paper towels, then season both sides with salt and pepper.
Set up a breading station with three shallow bowls. In the first bowl, place the flour. In the second, beat the eggs until well mixed. In the third, pour in the panko breadcrumbs. This three-step process—flour, egg, panko—gives the katsu its signature crunch.
Dredge each chicken piece in flour, shaking off the excess. Next, dip it into the beaten eggs, coating it completely. Finally, press it firmly into the panko, making sure it’s well covered. Lay the breaded cutlets on a plate or tray as you finish coating them.
Heat a large skillet over medium heat and pour in enough vegetable oil to cover the bottom generously—about 1/2 inch deep. Once the oil is hot (you can test it by dropping in a breadcrumb—it should sizzle immediately), gently place the breaded chicken into the pan. Don’t overcrowd the pan—work in batches if needed.
Fry each cutlet for about 3 to 4 minutes per side, until golden brown and cooked through. The coating should be crisp and deep golden, and the internal temperature should reach 165°F (74°C). Once cooked, transfer the cutlets to a paper towel-lined plate to drain excess oil.
Now make the Tonkatsu sauce. In a small bowl, mix together ketchup, Worcestershire sauce, soy sauce, sugar, Dijon mustard, and garlic powder. Stir until smooth and glossy. This sauce is tangy, slightly sweet, and totally addictive. You can store any leftovers in a jar in the fridge for up to a week.
Assemble the bowls by placing a scoop of warm rice into each bowl. Lay a generous handful of shredded cabbage on one side. Slice the cooked chicken cutlets into strips and arrange them neatly on top of the rice. Drizzle the Tonkatsu sauce over the chicken, or serve it on the side for dipping. Garnish with sliced green onions or sesame seeds, if you like.
Quick and easy
This recipe takes less than 45 minutes from start to finish. The steps are straightforward and don’t require any special equipment. The sauce comes together in one bowl and the frying is quick. It’s a great recipe for busy weeknights when you want something hot, crispy, and full of flavor.
You can even prep parts of it in advance. Bread the chicken and refrigerate it until ready to fry. The sauce can be made a few days ahead. You can also use precooked rice or microwave rice packs to save time.
Customizable
Katsu bowls are incredibly flexible. Swap the chicken for turkey cutlets, chicken ham slices, or even a firm tofu slab. For a lighter version, you can bake the breaded chicken in the oven at 400°F (200°C) for about 20–25 minutes, flipping halfway through.
For extra veggies, add pickled carrots, sliced cucumbers, or edamame. You can also swap the white rice for brown rice, cauliflower rice, or soba noodles. Make it spicy by adding a drizzle of sriracha or chili mayo over the top.
Want to make it gluten-free? Use gluten-free breadcrumbs and tamari in place of soy sauce. The result will still be delicious and just as satisfying.
Perfect for guests
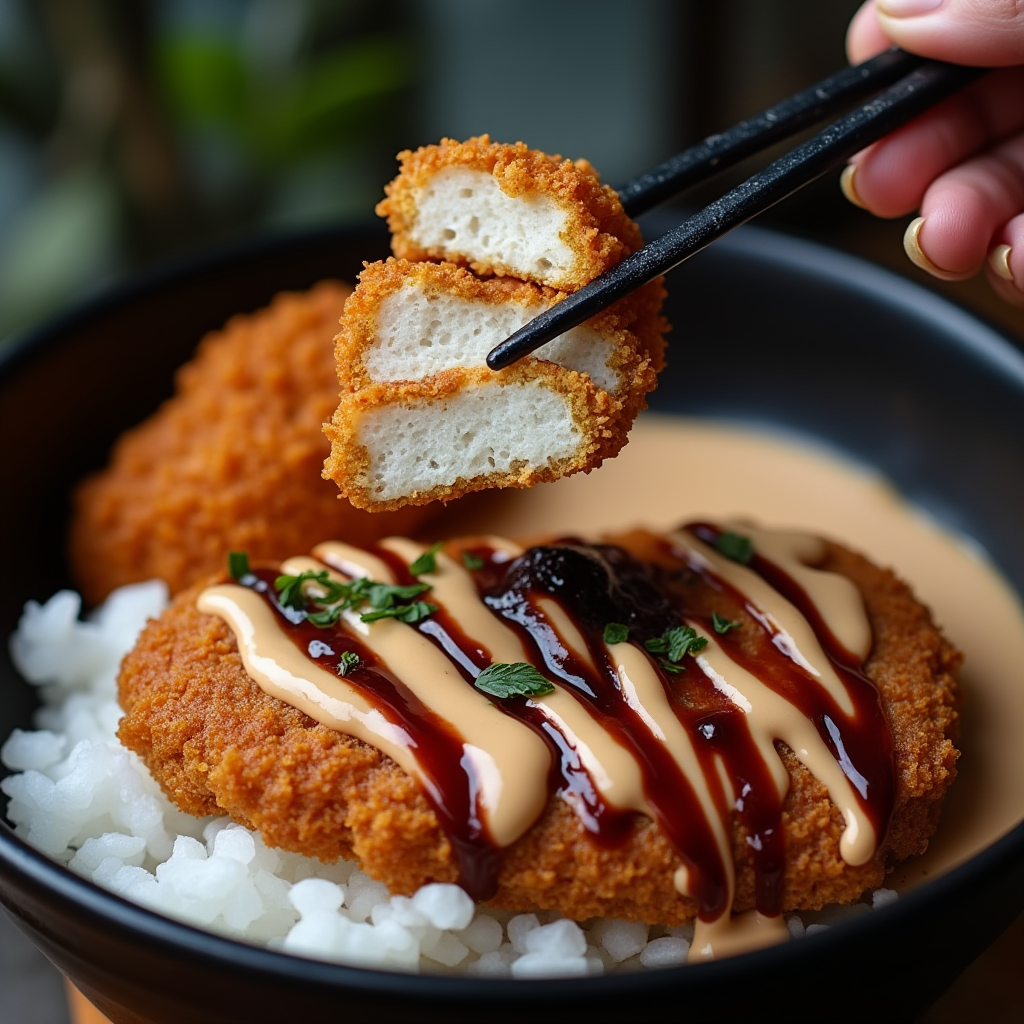
These katsu bowls are visually stunning and guaranteed to impress. The golden crispy chicken, vibrant cabbage, and shiny sauce look like something straight from a Japanese bistro. But they’re easy enough that you can make them for a casual dinner party or weekend get-together.
You can even serve them build-your-own style: lay out bowls of rice, cabbage, chicken strips, toppings, and sauce, and let everyone assemble their own. It’s interactive, fun, and makes entertaining feel effortless. Plus, you’ll have fewer dishes to do—always a win.
FAQs (Frequently Asked Questions)
Can I make the katsu ahead of time?
Yes. You can bread the chicken and refrigerate it for up to 12 hours before frying. Once cooked, the katsu can be reheated in the oven at 350°F (175°C) for 10–12 minutes to restore crispiness.
What kind of rice works best for this bowl?
Short-grain white rice is traditional and works great, but jasmine or sushi rice are excellent alternatives. You can also use brown rice or even cauliflower rice if you prefer.
Is there a way to make this recipe healthier?
You can bake the breaded chicken at 400°F (200°C) on a wire rack for 20–25 minutes, flipping halfway through. Use less sugar in the sauce and swap white rice for brown for a more wholesome version.
Can I freeze the katsu?
Yes. After frying, let the chicken cool completely, then freeze in a single layer. Reheat from frozen in the oven at 375°F (190°C) until heated through and crispy.
What else can I serve with these bowls?
They pair beautifully with miso soup, a cucumber salad, or steamed edamame. If you want to turn it into a feast, try serving with a simple miso-glazed veggie side.