
Introduction
I have always believed that the best desserts are the ones that look impressive but require the least amount of effort. That’s exactly how this Toffee Caramel No-Bake Cheesecake was born. I wanted to create something rich and indulgent without needing to turn on the oven—and let’s be honest, sometimes we just don’t want the heat in the kitchen. This cheesecake came together so effortlessly that I had to make it again the very next day. It’s now one of my go-to desserts for both casual afternoons and festive gatherings.
A Short Story About the Recipe
The first time I made this cheesecake, it was a warm summer afternoon, and baking was out of the question. I had leftover toffee bits from a cookie recipe, a jar of caramel sauce calling my name, and plenty of cream cheese in the fridge. I layered everything together with a buttery cookie crust, chilled it for a few hours, and what emerged was a creamy, dreamy cheesecake that disappeared in record time. Friends started asking for the recipe after just one bite. That’s when I knew it wasn’t just a lucky mix—it was a new classic.
Why You’ll Love This Recipe
Versatile
This no-bake cheesecake can be dressed up or down. You can add chopped nuts, a sprinkle of sea salt, or even drizzle with chocolate for extra flair. Whether you’re serving it in individual jars or a full-sized springform pan, it’s always a showstopper.
Budget-friendly
It doesn’t require expensive ingredients or fancy tools. With just a few pantry staples—cream cheese, caramel sauce, toffee bits, and cookies—you can create a luxurious dessert without overspending.
Ingredients for the Recipe
-
Cream cheese (softened)
-
Whipping cream or heavy cream
-
Powdered sugar
-
Vanilla extract
-
Toffee bits
-
Caramel sauce (store-bought or homemade, alcohol-free)
-
Digestive biscuits or graham crackers (for the base)
-
Unsalted butter (melted)
How to Make This Recipe
Step-by-Step Instructions
Step 1: Prepare the Base
Start by crushing the digestive biscuits or graham crackers into fine crumbs. You can do this using a food processor or by placing them in a sealed bag and crushing with a rolling pin. Transfer the crumbs to a bowl and add the melted butter. Mix until the crumbs are evenly coated and have a wet-sand texture.
Press the mixture firmly into the bottom of a springform pan (around 20–22 cm). Use the back of a spoon or the bottom of a glass to smooth and compress the crust evenly. Place the pan in the refrigerator to chill while you prepare the filling.
Step 2: Whip the Cream
In a separate bowl, pour in the whipping cream. Beat it with a hand mixer or stand mixer on high speed until stiff peaks form. This step helps to give the cheesecake a light and airy texture.
Set the whipped cream aside.
Step 3: Mix the Cream Cheese Filling
In another large mixing bowl, add the softened cream cheese. Beat it until smooth and creamy. Add powdered sugar and vanilla extract, and mix until well combined. Make sure there are no lumps in the mixture.
Next, gently fold the whipped cream into the cream cheese mixture. Do this in batches and use a spatula to avoid deflating the whipped cream. Fold until fully incorporated.
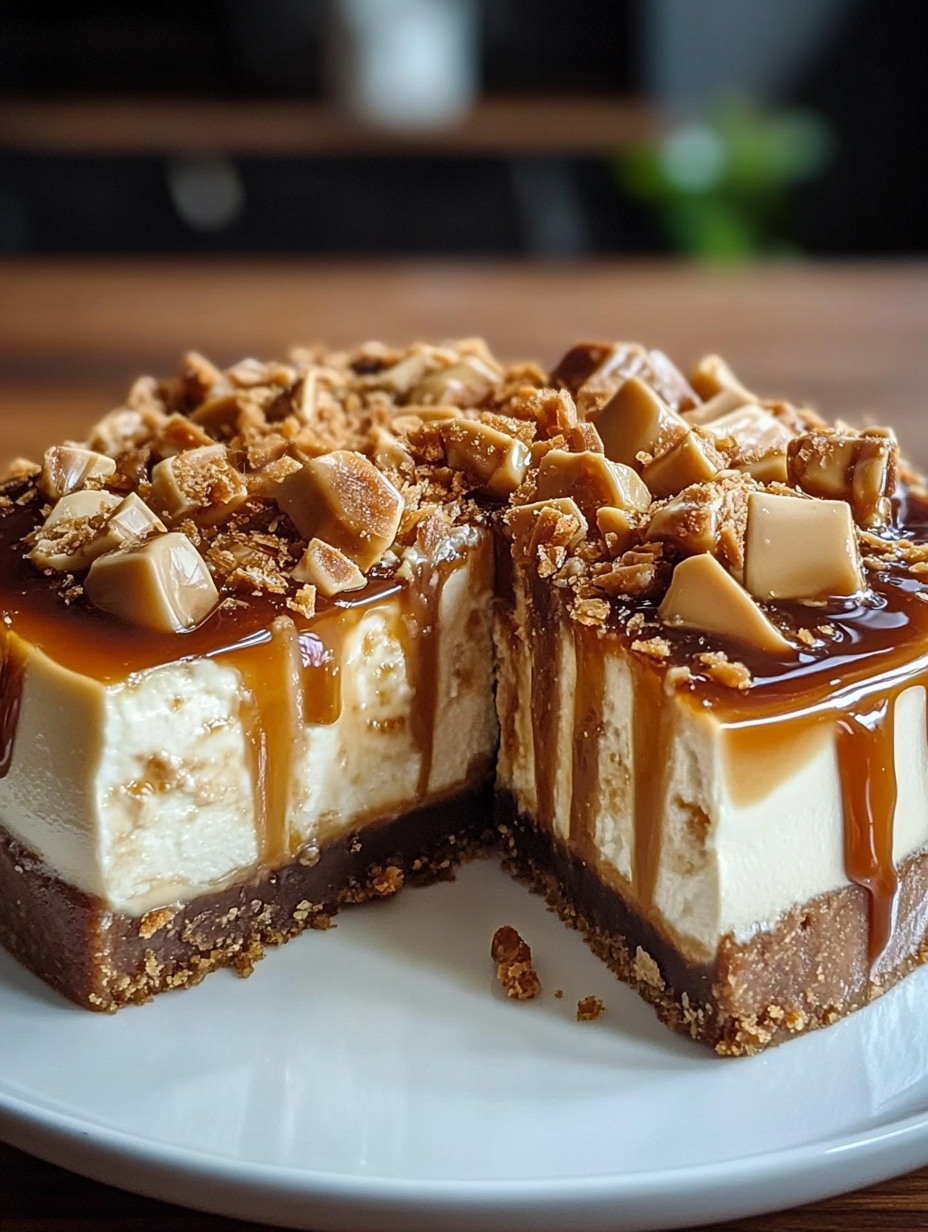
Step 4: Add the Toffee and Caramel
Stir in most of the toffee bits (reserve a few tablespoons for topping). Swirl in half of the caramel sauce using a spoon or spatula. Do not overmix—the idea is to create visible caramel ribbons within the filling.
Step 5: Assemble the Cheesecake
Take the crust out of the refrigerator and pour the filling on top. Smooth the surface with a spatula or offset knife. Drizzle the remaining caramel sauce over the top and sprinkle with the reserved toffee bits.
Cover the cheesecake with plastic wrap and refrigerate for at least 6 hours, preferably overnight, to allow it to set completely.
Step 6: Serve
Once fully chilled and set, remove the cheesecake from the springform pan. Slice with a sharp knife wiped clean between each cut. Serve chilled for the best texture and flavor.
Quick and Easy
This cheesecake doesn’t require baking, complicated tools, or advanced skills. The steps are straightforward, and the chilling process does all the hard work for you. It’s ideal for when you need a delicious dessert without turning on the oven.
Customizable
You can add crushed nuts like pecans or almonds for extra crunch, or swirl in chocolate or peanut butter instead of caramel for a flavor twist. For individual servings, you can assemble the cheesecake in glasses or jars.
Perfect for Guests
This dessert is creamy, indulgent, and visually stunning. It holds its shape well when sliced and looks elegant with its toffee-caramel topping. It’s a great option for dinner parties, potlucks, or special celebrations.
FAQs (Frequently Asked Questions)
Can I freeze this cheesecake?
Yes, you can freeze the finished cheesecake for up to one month. Wrap it tightly in plastic wrap and foil. Let it thaw in the refrigerator for several hours before serving. Keep in mind that the texture may be slightly softer after freezing.
What can I use instead of digestive biscuits?
Graham crackers work well, but you can also use vanilla wafers, oat cookies, or chocolate biscuits depending on your taste preferences.
Can I use low-fat cream cheese?
Yes, but the texture will be slightly less rich and creamy. Full-fat cream cheese gives the best consistency for no-bake cheesecakes.
Is it possible to make this dairy-free?
Yes, use dairy-free cream cheese and coconut cream in place of whipping cream. Be sure to check that your caramel sauce is also dairy-free.
How long does the cheesecake need to chill?
At least 6 hours in the refrigerator is recommended, but for best results, let it chill overnight. This ensures the cheesecake sets properly and holds its shape when sliced.
Can I make this ahead of time?
Absolutely. This dessert is perfect for making a day in advance. Just keep it chilled until ready to serve.