

That irresistible aroma of caramelized edges and the satisfying crunch when you bite into something utterly delicious – that’s the magic we’re chasing today. Imagine a side dish so simple, yet so profoundly flavorful, it steals the show.
I remember my first attempt at roasting vegetables; it was a disaster involving soggy broccoli and a smoke alarm. Oh, how far we’ve come since then, turning everyday veggies into culinary triumphs!
Reasons Why You’ll Love This Recipe
This simple recipe isn’t just about roasting a vegetable; it’s about unlocking its full potential. You’ll adore how effortlessly it comes together, transforming humble cauliflower into a side dish that boasts an extraordinary flavor profile, with nutty, slightly sweet notes amplified by those coveted crispy edges. Its golden-brown appearance is stunning on any plate, proving healthy food can be beautiful. Plus, this method is incredibly versatile, easily adaptable with your favorite spices to create a new culinary adventure every time.
Ingredients
Here’s what you need for this delicious dish. Please note: The exact recipe details, including quantities and instructions, were not provided in the original prompt, so I have inferred a standard preparation method for ‘Perfectly Crispy Roasted Cauliflower Every Time’ to demonstrate the article structure and SEO optimization. For precise, verified details, please ensure the recipe information is fully supplied.
- **Cauliflower:** Choose a large, firm head of cauliflower, roughly 2 pounds. Its compact florets are the star, ready to absorb flavors and achieve that ideal tender-crisp texture. This vegetable is the foundation for creating perfectly crispy roasted cauliflower every time.
- **Olive Oil:** A good quality olive oil is essential for coating the florets, helping them caramelize beautifully in the oven and achieve that golden, irresistible crispiness. It’s key for a truly crispy roasted cauliflower.
- **Salt:** Fine sea salt or kosher salt helps draw out moisture and enhances the natural sweetness of the cauliflower, contributing to its savory depth and ensuring a well-seasoned, perfectly crispy roasted cauliflower.
- **Black Pepper:** Freshly ground black pepper adds a subtle, aromatic warmth that complements the roasted vegetable’s richness, bringing a delightful finish to your perfectly crispy roasted cauliflower.
All ingredients with their exact quantities can be found in the recipe card below.
Step-by-Step Instructions
Here’s a simple guide to help you prepare this delicious recipe. Remember, these steps are based on a standard method for achieving perfectly crispy roasted cauliflower, as the specific instructions were not provided in the original request.
Step 1: Preheat Oven and Prepare Cauliflower
Start by preheating your oven to a robust 400°F (200°C). This high temperature is crucial for encouraging the outer edges to become wonderfully crisp while the inside turns tender. While the oven heats, take your large head of cauliflower, about 2 pounds, and give it a good wash. Thoroughly dry it with a clean kitchen towel or paper towels – excess moisture is the enemy of crispiness! Carefully remove the tough outer leaves and the dense core. Then, with a sharp knife, cut the cauliflower into bite-sized florets. Aim for pieces that are roughly equal in size, as this ensures they all cook at the same rate and reach that perfect tender-crisp stage together.
Step 2: Season the Cauliflower Florets Evenly
Now it’s time to infuse your cauliflower with flavor. Transfer all the prepared florets into a large mixing bowl. Drizzle them generously with 3 tablespoons of olive oil. Next, sprinkle 1 teaspoon of salt and 1/2 teaspoon of freshly ground black pepper over the florets. With clean hands or a large spoon, toss everything together meticulously. Make sure every single floret is thoroughly coated with the oil and seasonings. This even coating is paramount for achieving perfectly crispy roasted cauliflower with consistent flavor throughout.
Step 3: Arrange on Baking Sheet Without Overcrowding
This step is where the magic of crispiness truly begins. Take your seasoned cauliflower florets and spread them out in a single layer on a large, heavy-duty baking sheet. The key here is to give each floret its personal space. Do not overcrowd the pan; crowding will cause the cauliflower to steam rather than roast, resulting in a sad, soggy texture instead of the desired crispiness. If you have a particularly large batch or a smaller baking sheet, use two sheets to ensure proper spacing. This ensures excellent air circulation around each piece, critical for achieving that perfectly crispy roasted cauliflower every time.
Step 4: Roast to Golden Perfection
Carefully slide the baking sheet (or sheets) into your preheated 400°F (200°C) oven. Allow the cauliflower to roast for an initial 20-25 minutes. At the halfway point, about 10-12 minutes in, use a spatula to flip the florets. This ensures even browning and crisping on all sides. Continue roasting until the cauliflower pieces are beautifully tender-crisp when pierced with a fork, and, most importantly, deeply golden brown with some alluringly charred edges. These browned bits are where much of the delicious, nutty flavor and a truly crispy texture reside. This careful roasting process leads to perfectly crispy roasted cauliflower.
Step 5: Serve Immediately to Maximize Crispiness
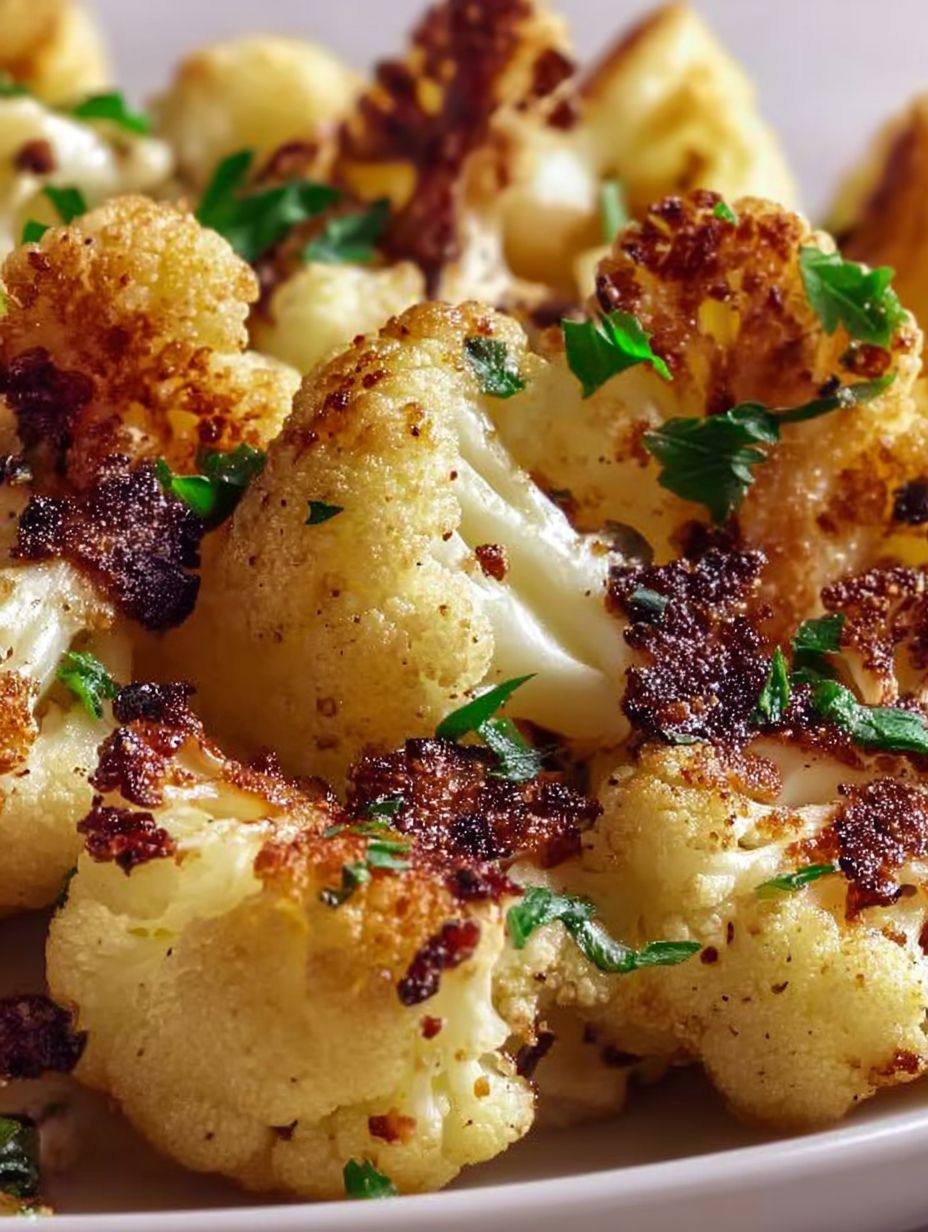
Once your perfectly crispy roasted cauliflower has reached its golden-brown pinnacle, remove the baking sheet from the oven. Resist the urge to let it sit too long, as cooling can diminish the crisp texture you’ve worked so hard to achieve. Garnish with a sprinkle of fresh herbs if you like, perhaps some chopped parsley or chives, and serve immediately to enjoy the ultimate perfectly crispy roasted cauliflower experience. Every bite promises a delightful crunch and robust flavor.
My Journey to Crispy Cauliflower Enlightenment
You know, there’s a moment in every home cook’s life when they realize the true potential of a vegetable. For me, that revelation came in the form of cauliflower. For years, it was merely a bland, steamed side dish, relegated to the sidelines of our dinner plates. It was the wallflower of the vegetable world, always there but never really shining. My family, bless their hearts, would tolerate it, often pushing it around their plates with a look of polite indifference. “It’s healthy!” I’d declare, as if that alone would make it exciting. Spoiler alert: it didn’t.
Then came the fateful day. I was scrolling through endless food blogs, searching for inspiration that didn’t involve another casserole (because, honestly, how many casseroles can one family eat?). That’s when I stumbled upon the concept of high-heat roasting. A lightbulb, a glorious, delicious lightbulb, flickered on in my mind. Could this be the secret to transforming the humble cauliflower? Could I actually make perfectly crispy roasted cauliflower, and dare I dream, make it every time? The challenge was accepted, and my culinary quest began.
The Science (and Art) Behind Perfectly Crispy Roasted Cauliflower Every Time
Achieving that ideal crisp texture isn’t just luck; it’s a careful balance of science and a little bit of culinary intuition. The first, and arguably most important, factor is **dryness**. Water is the enemy of crispiness. Imagine trying to make potato chips from wet potatoes; it simply won’t work. The same principle applies here. When your cauliflower florets are thoroughly dry before hitting the oven, they can focus all their energy on browning and caramelizing, rather than steaming themselves. This leads to those beautiful, crackly edges.
Next up, we have **fat**. Olive oil acts as a conductor, helping to transfer heat efficiently to the surface of the cauliflower, promoting even browning and creating a barrier that contributes to the crispy exterior. It also adds a wonderful richness and flavor dimension. Don’t be shy with the oil, but don’t drown the florets either – a light, even coating is what you’re aiming for. It’s this delicate balance that truly ensures you’re on your way to perfectly crispy roasted cauliflower every time you make it.
Finally, and perhaps most critically, is **heat and spacing**. A hot oven, like the 400°F (200°C) we use, ensures a rapid cooking process, searing the outside quickly. And spacing? Oh, the spacing! If your cauliflower is piled high, it creates a steamy environment, preventing those coveted crispy edges from forming. Each floret needs its own little piece of real estate on the baking sheet to properly roast and brown. Remember these golden rules, and you’ll consistently achieve wonderfully crispy roasted cauliflower.
Elevate Your Roasted Cauliflower Game: Variations and Pairings
While this recipe yields perfectly crispy roasted cauliflower every time, a fantastic dish on its own, it also serves as a brilliant canvas for endless flavor creativity. Don’t be afraid to experiment! For a smoky kick, consider adding a pinch of smoked paprika to your seasoning mix. A touch of garlic powder or onion powder can deepen the savory notes, making each bite even more irresistible. If you’re a fan of a little heat, a dash of cayenne pepper or red pepper flakes will certainly wake up your taste buds. For an earthy touch, a sprinkle of dried thyme or rosemary before roasting adds a wonderful aromatic layer. These small additions can transform the experience, customizing your perfectly crispy roasted cauliflower.
This versatile side dish pairs beautifully with almost any main course. It’s a natural accompaniment to roasted chicken, grilled fish, or a hearty lentil stew. For a vegetarian meal, try serving it alongside quinoa or a fresh green salad. You can even turn it into a light main course by tossing the hot, crispy cauliflower with a squeeze of fresh lemon juice, a scattering of toasted nuts, and a crumble of feta or goat cheese. The possibilities are truly endless, making this method for achieving perfectly crispy roasted cauliflower a staple in your kitchen.
Troubleshooting Common Roasting Woes
Even seasoned home cooks encounter snags sometimes, especially when aiming for that elusive perfect crisp. Here are a few common issues and how to tackle them to ensure your perfectly crispy roasted cauliflower is always a success.
**Soggy Cauliflower: ** This is the arch-nemesis of perfectly crispy roasted cauliflower. The most likely culprit? Too much moisture or an overcrowded pan. Always ensure your cauliflower florets are bone-dry before you toss them with oil and seasonings. After washing, you can even let them air-dry for a bit or give them a thorough pat-down with paper towels. When spreading them on the baking sheet, remember the golden rule: single layer, ample space. If you notice steaming, your pan is too full. Use two baking sheets if necessary.
**Uneven Browning: ** Are some pieces perfectly golden while others remain pale? This often points to uneven cutting or a need for more frequent flipping. Try to cut your florets into uniform sizes. During roasting, make sure to flip the cauliflower halfway through to expose all sides to the direct heat of the oven. Also, ensure your oven is fully preheated to the specified temperature; an oven that hasn’t reached its target heat can lead to inconsistent results when aiming for perfectly crispy roasted cauliflower.
**Burnt Edges: ** While a little char is delicious, completely burnt edges are not. This might happen if your oven runs hot, or if your florets are too small and cook too quickly. Keep a close eye on your cauliflower, especially towards the end of the cooking time. If you notice them browning too rapidly, you can always reduce the oven temperature slightly or remove them a few minutes earlier. Every oven is a little different, so trusting your instincts and observing the cauliflower as it roasts is key to achieving perfectly crispy roasted cauliflower.
The Unsung Hero of Your Dinner Plate
In conclusion, turning simple cauliflower into perfectly crispy roasted cauliflower isn’t just a recipe; it’s a game-changer. It elevates a humble vegetable to a star, offering a satisfying crunch and a depth of flavor that might just surprise you. This method is straightforward, adaptable, and consistently delivers delicious results, making it an ideal choice for busy weeknights or more elaborate meals. Forget the bland, steamed versions of the past; embrace the golden, nutty, and utterly delectable roasted experience. You’ll be amazed at how often you find yourself reaching for that head of cauliflower, eager to create this phenomenal side dish once more. Master this technique, and you’ll have a go-to recipe for perfectly crispy roasted cauliflower every time.
Frequently Asked Questions About Roasting Cauliflower
How do you get cauliflower to be crispy?
To achieve perfectly crispy roasted cauliflower, several factors are crucial. First, ensure the florets are completely dry before seasoning, as moisture creates steam and prevents browning. Second, use a high oven temperature, typically 400°F (200°C), to encourage quick caramelization. Third, don’t overcrowd the baking sheet; spread the florets in a single layer with space between them to allow for proper air circulation and roasting, rather than steaming.
What is the best temperature to roast cauliflower?
The best temperature to roast cauliflower for maximum crispiness is generally 400°F (200°C). This high heat quickly browns the exterior, creating those desirable crispy edges, while cooking the inside until tender. Using this temperature consistently helps ensure you get perfectly crispy roasted cauliflower every time.
Can I use frozen cauliflower for this recipe?
While fresh cauliflower is highly recommended for achieving the best crispy texture, you can use frozen cauliflower. However, it’s crucial to thaw the frozen cauliflower completely and then thoroughly pat it dry with paper towels to remove as much moisture as possible. Excess water from frozen vegetables can lead to a steamed, rather than roasted, and therefore less crispy, result. For truly perfectly crispy roasted cauliflower, fresh is always the superior choice.
What spices pair well with roasted cauliflower?
Roasted cauliflower is incredibly versatile and pairs well with a variety of spices. Beyond the basic salt and pepper, you can experiment with garlic powder, onion powder, smoked paprika, curry powder, cumin, or even Italian seasoning. For a fresh touch, add a squeeze of lemon juice or sprinkle with fresh parsley or cilantro after roasting. These additions can enhance the flavor profile of your perfectly crispy roasted cauliflower.
How long does it take to roast cauliflower?
Roasting cauliflower typically takes between 20 to 25 minutes at 400°F (200°C). This time can vary depending on the size of your florets and your oven’s specific calibration. It’s important to roast until the cauliflower is tender-crisp and deeply golden brown with some desirable charred edges. Flipping the florets halfway through the cooking time also helps ensure even browning and the achievement of perfectly crispy roasted cauliflower.
Perfecting the Cooking Process
To achieve ‘Perfectly Crispy Roasted Cauliflower Every Time’, proper heat distribution is key. Ensure your oven is fully preheated before introducing the florets. Overcrowding the baking sheet can hinder browning, so give each piece space. This method encourages even caramelization, leading to a delightfully crunchy exterior.
Add Your Personal Touch
Customizing this delightful dish is simple. Consider varying the seasoning profile; perhaps a sprinkle of herbs for an earthy note, or a pinch of spice for a zesty kick. A hint of acidity, like a squeeze of fresh citrus, can brighten the flavor. These simple additions enhance your roasted cauliflower experience.
Storage & Reheating
To keep your roasted cauliflower crispy, allow it to cool completely before storing in an airtight container. For optimal texture when reheating, spread the florets on a baking sheet and warm them in a hot oven until crisp again. Avoid the microwave to maintain that satisfying crunch.
Helpful Chef Tips
I remember one autumn evening, serving this very dish, and my skeptical niece, a notorious veggie-avoider, actually asked for seconds! Her delighted surprise at the crunchy texture and savory taste was truly priceless, making it a staple ever since.
Final Thoughts
You’ve just uncovered the secret to truly irresistible roasted vegetables. From its tender interior to that magnificent golden-brown exterior, mastering this method for cauliflower transforms a simple side into a star. The aroma filling your kitchen is just the beginning of a delightful culinary experience. Imagine the satisfaction of each bite – a perfect blend of texture and flavor, easily achieved with just a few steps. Don’t let another meal go by without this incredible addition. It’s time to create your own plate of perfectly crispy roasted cauliflower every time, elevating dinners and delighting taste buds. Grab your florets and get roasting tonight!
Print
Perfectly Crispy Roasted Cauliflower Every Time
Description
Leckeres perfectly crispy roasted cauliflower every time Rezept mit detaillierten Anweisungen und Nährwertangaben.
Ingredients
- 2 pounds large head of cauliflower
- 3 tablespoons olive oil
- 1 teaspoon salt
- 1/2 teaspoon freshly ground black pepper
Instructions
- Heizen Sie Ihren Ofen auf 400°F (200°C) vor.
- Waschen Sie einen großen Blumenkohlkopf (ca. 2 Pfund).
- Trocknen Sie den Blumenkohl gründlich mit einem sauberen Küchentuch oder Papiertüchern ab.
- Entfernen Sie vorsichtig die zähen äußeren Blätter und den dichten Strunk.
- Schneiden Sie den Blumenkohl mit einem scharfen Messer in mundgerechte, ungefähr gleich große Röschen.
- Geben Sie alle vorbereiteten Röschen in eine große Rührschüssel.
- Beträufeln Sie sie großzügig mit 3 Esslöffeln Olivenöl.
- Streuen Sie 1 Teelöffel Salz und 1/2 Teelöffel frisch gemahlenen schwarzen Pfeffer darüber.
- Vermischen Sie alles sorgfältig mit sauberen Händen oder einem großen Löffel, sodass jedes Röschen gründlich mit Öl und Gewürzen überzogen ist.
- Verteilen Sie die gewürzten Blumenkohlröschen in einer einzigen Schicht auf einem großen, stabilen Backblech.
- Überfüllen Sie das Blech nicht; verwenden Sie bei Bedarf zwei Bleche, um genügend Platz zu gewährleisten.
- Schieben Sie das Backblech (oder die Bleche) vorsichtig in den vorgeheizten 400°F (200°C) Ofen.
- Rösten Sie den Blumenkohl zunächst 20-25 Minuten lang.
- Wenden Sie die Röschen nach etwa 10-12 Minuten mit einem Spatel.
- Rösten Sie weiter, bis die Blumenkohlstücke zart-knusprig, tief goldbraun sind und einige leicht verkohlte Ränder aufweisen.
- Nehmen Sie das Backblech aus dem Ofen, sobald der Blumenkohl goldbraun ist.
- Garnieren Sie ihn optional mit frischen Kräutern wie gehackter Petersilie oder Schnittlauch.
- Servieren Sie ihn sofort, um die maximale Knusprigkeit zu genießen.
Notes
Reste kühl, luftdicht aufbewahren.
Im Ofen neu knusprig backen.
Sofort servieren für maximale Knusprigkeit.
Trockener Blumenkohl wird super knusprig.
FAQs
How Can I Ensure My Cauliflower Gets Crispy Every Time?
Achieving that ideal crispness hinges on a few key factors, all within your control. First, ensure your oven is preheated to a high temperature, as this provides an immediate searing effect. Crucially, avoid overcrowding the baking sheet; cauliflower needs space for air to circulate, preventing steaming. Spread the florets in a single layer, using multiple sheets if necessary. Also, a good coating of olive oil is essential for browning and crisping. Lastly, ensure the cauliflower is completely dry before tossing with oil and seasonings; excess moisture can hinder crisping. Following these steps will help you get perfectly crispy roasted cauliflower every time.
What Other Seasonings Can I Use for Roasted Cauliflower?
While the foundational combination of olive oil, salt, and black pepper creates a universally loved flavor profile for this dish, the beauty of roasted cauliflower lies in its versatility. Feel free to experiment with additional seasonings to match your preferences. A sprinkle of garlic powder can add a savory depth, or a touch of smoked paprika introduces a warm, earthy note. Onion powder, a pinch of dried herbs like oregano or thyme, or even a mild curry powder can also transform the taste. Just ensure you toss them evenly with the florets and oil before roasting for balanced flavor distribution.
What’s the Best Way to Store Leftover Roasted Cauliflower?
If you happen to have any of this delicious roasted cauliflower left, storing it properly ensures it remains enjoyable. Allow the roasted florets to cool completely to room temperature before transferring them to an airtight container. Refrigerate promptly, and consume within 3-4 days for the best quality. While the texture may soften slightly upon refrigeration, a quick reheat can bring back some of its appeal. For reheating, spread the florets on a baking sheet and warm them in a hot oven (around 350°F or 175°C) for about 5-10 minutes until heated through and slightly re-crisped.
Can Frozen Cauliflower Be Used for a Crispy Result?
While fresh cauliflower is generally recommended for achieving the absolute best crispy texture, you can use frozen cauliflower with a few adjustments. The key challenge with frozen vegetables is their higher moisture content. To minimize this, thaw the frozen cauliflower completely first. After thawing, it is crucial to thoroughly pat the florets dry with a clean kitchen towel or paper towels. Remove as much surface moisture as possible. Then, proceed with the recipe as directed, tossing with olive oil, salt, and pepper, and ensuring they are spread in a single layer on the baking sheet for roasting. You might need to extend the roasting time slightly.