

Imagine a dessert that whispers sweet nothings of nutty richness, a creamy dream enrobing tender layers, all with an irresistible coffee kick. This no-bake pistachio tiramisu offers exactly that: a symphony of textures and flavors that will transport your taste buds to pure bliss. It reminds me of that time my aunt tried to bake a tiramisu for a family reunion – it turned into a gooey, delightful mess, but proved that some desserts are just better left unbaked and perfectly chilled.
Why This No-Bake Pistachio Tiramisu is Your Next Dessert Obsession
You’re going to adore this easy pistachio tiramisu for so many reasons. Its simple preparation means you spend less time in the kitchen and more time enjoying the anticipation of pure deliciousness. This unique flavor profile takes a beloved classic and elevates it with the vibrant, earthy notes of pistachio, creating a dessert that stands out from the crowd. Plus, its stunning layered appearance makes it a showstopper on any dessert table, promising “oohs” and “aahs” even before the first bite. And the best part? It’s incredibly versatile; a perfect quick dessert for casual gatherings or an elegant finish to a special meal.
Ingredients
Here’s what you need for this delicious dish:
- **Strong brewed espresso or coffee** This forms the essential base for moistening the ladyfingers, infusing them with that classic Italian coffee flavor. Ensure it is completely cooled before use to prevent the ladyfingers from disintegrating.
- **Ladyfingers (savoiardi)** These light, airy biscuits are the structural backbone of this no-bake pistachio tiramisu. They readily absorb liquid, becoming wonderfully tender without turning soggy if dipped quickly.
- **Large egg yolks** Whisked with sugar over heat, they create a rich, stable sabayon that contributes to the silky smooth texture and decadent richness of the mascarpone cream.
- **Granulated sugar** Essential for sweetening the egg yolk mixture and balancing the strong flavors of coffee and pistachio, ensuring a perfectly harmonious taste.
- **Mascarpone cheese, softened** The star of the creamy filling, this Italian cream cheese lends an unparalleled richness and velvety texture. Softening it at room temperature ensures a lump-free, smooth mixture.
- **Pistachio paste** This concentrated paste is the secret weapon for an intense, natural pistachio flavor and a beautiful green hue in your creamy layers. Choose a high-quality paste for the most authentic taste and vibrant color.
- **Vanilla extract** A touch of vanilla complements the nutty pistachio and rich mascarpone, adding warmth and depth to the overall flavor profile.
- **Heavy cream, cold** Whipped to stiff peaks, this adds lightness and airiness to the dense mascarpone mixture, resulting in a perfectly balanced, fluffy texture. Ensure it is very cold for optimal whipping.
- **Shelled pistachios, finely chopped, for garnish** Providing a delightful crunch and an extra burst of nutty flavor, these are sprinkled on top for both visual appeal and textural contrast.
- **Dark chocolate, melted, for drizzle** A delicate drizzle of rich, slightly bitter dark chocolate perfectly balances the sweetness of the tiramisu and adds an elegant finishing touch.
The complete ingredient list, including quantities, can be found directly under the recipe card.
Creating a no-bake pistachio tiramisu is more than just following steps; it’s an act of love and patience. This dessert might seem fancy, but it’s surprisingly straightforward, designed for those moments when you crave something extraordinary without the fuss of turning on the oven. The magic truly happens during the chilling process, when all the distinct flavors begin to dance and mingle, transforming individual components into a cohesive, dreamy whole. Think of it as a culinary meditation, where each layer contributes to a grander, more delicious symphony. This easy pistachio tiramisu is perfect for impressing guests or simply treating yourself to a well-deserved indulgence.
The key to any truly great no-bake dessert often lies in the quality of your ingredients and the care you put into each step. For this quick dessert, selecting a good espresso or strong coffee will make a world of difference. That robust, slightly bitter note is crucial for balancing the sweetness and richness of the creamy pistachio layers. And don’t skimp on the pistachio paste! A high-quality paste delivers that authentic, nuanced nutty flavor and beautiful green tint that defines this elegant twist on tiramisu. It’s those little details that elevate a simple treat into an unforgettable culinary experience, making it a standout amongst other no-bake pistachio desserts.
Step-by-Step Instructions
Follow these simple steps to prepare this delicious dish:
Step 1: Prepare the Coffee and Custard Base
Begin by brewing 1 ½ cups of strong espresso or coffee. Set it aside in a bowl to cool completely; this step is crucial for preventing the ladyfingers from becoming mushy. Next, prepare a double boiler by setting a heatproof bowl over a saucepan of simmering water. In the bowl, whisk together the 4 large egg yolks and ¾ cup granulated sugar constantly for 8-10 minutes. Continue whisking until the mixture becomes pale yellow, thickens noticeably, and registers 160°F (71°C) on a thermometer. Remove the bowl from the heat and allow the sabayon to cool completely to room temperature, stirring it occasionally to prevent a skin from forming.
Step 2: Create the Luscious Pistachio Cream
In a separate large bowl, combine the cooled egg yolk mixture with 16 ounces of softened mascarpone cheese and ½ cup of rich pistachio paste. Mix these ingredients gently but thoroughly until the mixture is smooth and evenly combined, ensuring no lumps remain. Stir in 1 teaspoon of vanilla extract, which enhances the dessert’s aromatic depth. In another chilled bowl, whip 1 ½ cups of cold heavy cream until stiff peaks form, indicating it’s ready to be incorporated. Carefully fold the whipped cream into the mascarpone-pistachio mixture until it is just combined. Be very gentle during this step to maintain the airiness of the whipped cream, which contributes to the light texture of the final quick dessert.
Step 3: Begin Layering the Ladyfingers
To start the assembly process, quickly dip each of the 24-30 ladyfingers into the cooled espresso. It is vital to ensure each ladyfinger is moistened but not oversaturated, as too much coffee will make the tiramisu watery and mushy. A quick dip on each side is usually sufficient. Once dipped, arrange a single layer of these coffee-soaked ladyfingers neatly in the bottom of a 9×13 inch (23×33 cm) baking dish, creating a solid, absorbent base for the creamy layers.
Step 4: Layer the Cream and Chill to Perfection
After placing the first layer of ladyfingers, spread half of the prepared pistachio mascarpone cream evenly over them. Ensure the cream covers the ladyfingers from edge to edge. Repeat this layering process with another single layer of quickly dipped ladyfingers, followed by the remaining pistachio mascarpone cream, spreading it smoothly to cover the second ladyfinger layer. Once all layers are in place, cover the baking dish tightly with plastic wrap. Refrigerate the assembled no-bake pistachio tiramisu for a minimum of 6 hours, or ideally overnight. This extended chilling period is absolutely critical for allowing the tiramisu to set firmly and for all the vibrant flavors to meld beautifully, creating a cohesive and delightful dessert.
Step 5: Garnish and Serve Your Masterpiece
Just before serving your exquisite no-bake pistachio tiramisu, melt 2 ounces of dark chocolate until smooth and fluid. Drizzle the melted chocolate artfully over the top of the chilled tiramisu, creating an elegant visual appeal. Then, generously sprinkle the ½ cup of finely chopped shelled pistachios over the chocolate. These chopped nuts add a delightful crunch and a concentrated burst of nutty flavor, complementing the creamy layers below. Slice and serve immediately to enjoy this spectacular quick dessert.
This no-bake pistachio tiramisu is more than just a recipe; it’s an experience. The delicate balance of textures and flavors makes it a memorable treat for any occasion. Whether you’re hosting a dinner party or simply looking for a delightful sweet escape, this layered dessert fits the bill perfectly. It’s the kind of dish that garners compliments and requests for the recipe, all while requiring minimal fuss in the kitchen.
One of the great joys of making a quick dessert like this is the transformation that occurs during the chilling process. It’s like magic watching the separate ingredients come together, becoming a harmonious symphony of taste and texture. The ladyfingers soften to a cake-like consistency, the mascarpone cream firms up, and the pistachio flavor intensifies, making every spoonful a pure delight. This truly is an effortless pistachio indulgence that delivers on all fronts.
**Recipe Card**
**No-Bake Pistachio Tiramisu for a Quick Dessert**
**Description: **
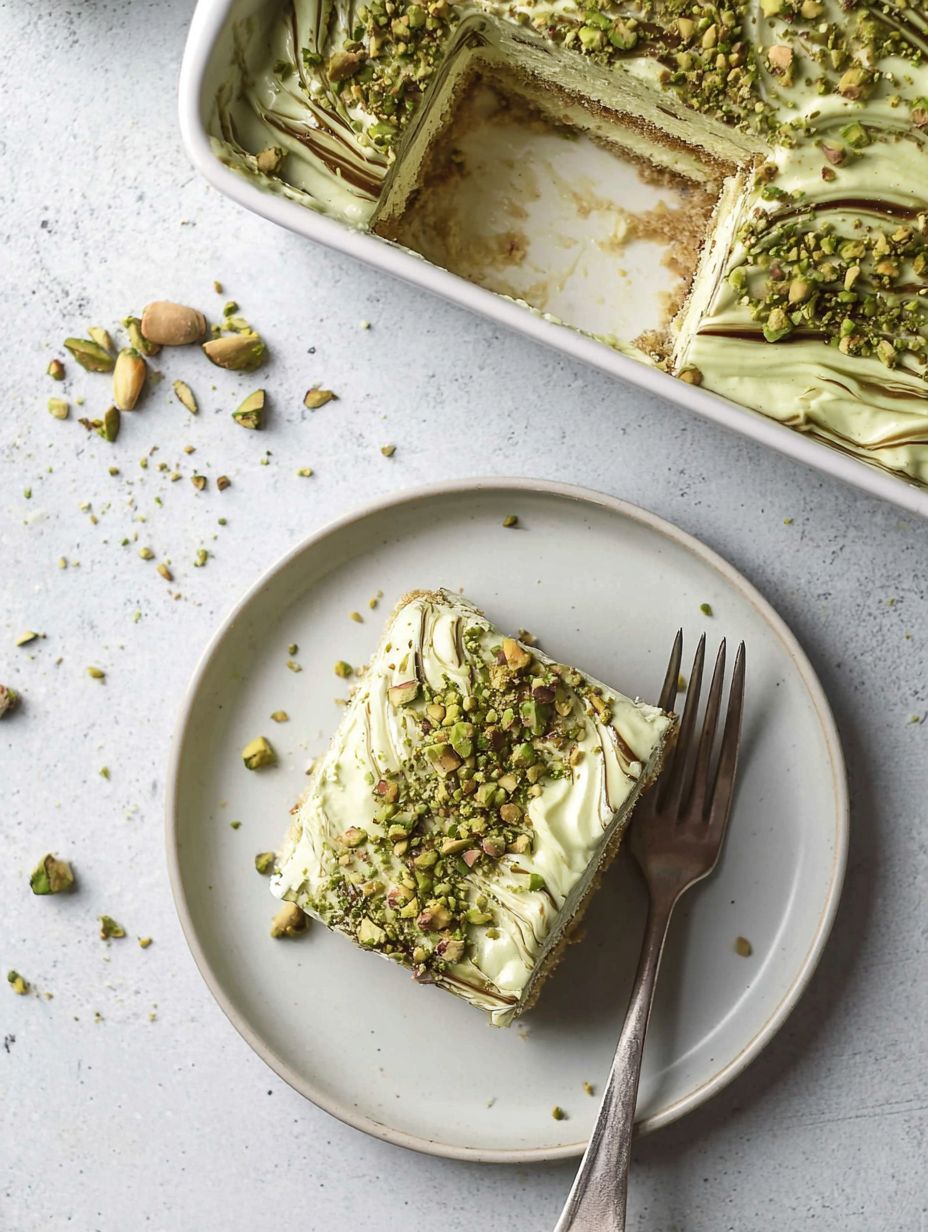
This Pistachio Tiramisu offers a sophisticated twist on a classic Italian dessert. Layers of delicate ladyfingers are briefly steeped in rich espresso, then enveloped by a smooth, creamy mascarpone filling infused with the subtle, nutty essence of pistachio. The dessert is chilled to allow the flavors to meld and the textures to set, resulting in a harmonious balance of soft, moist cake and velvety cream. A generous topping of finely chopped pistachios and a delicate dark chocolate drizzle provides a pleasant textural contrast and a touch of elegant bitterness.
**Ingredients: **
- 1 ½ cups strong brewed espresso or coffee, cooled
- 24-30 ladyfingers (savoiardi)
- 4 large egg yolks
- ¾ cup granulated sugar
- 16 ounces mascarpone cheese, softened
- ½ cup pistachio paste
- 1 teaspoon vanilla extract
- 1 ½ cups heavy cream, cold
- ½ cup shelled pistachios, finely chopped, for garnish
- 2 ounces dark chocolate, melted, for drizzle
**Instructions: **
1. Brew the espresso or strong coffee and set aside to cool completely.
2. In a heatproof bowl set over a saucepan of simmering water (creating a double boiler), whisk together the egg yolks and granulated sugar. Continue whisking constantly for 8-10 minutes, until the mixture is pale yellow, thick, and reaches 160°F (71°C). Remove from heat and let cool to room temperature, stirring occasionally.
3. In a large bowl, combine the cooled egg yolk mixture with the softened mascarpone cheese and pistachio paste. Mix gently until smooth and well combined. Stir in the vanilla extract.
4. In a separate cold bowl, whip the cold heavy cream until stiff peaks form. Gently fold the whipped cream into the mascarpone-pistachio mixture until just combined, being careful not to deflate the cream.
5. To assemble, quickly dip each ladyfinger into the cooled espresso, ensuring it is moistened but not soggy. Arrange a single layer of dipped ladyfingers in the bottom of a 9×13 inch (23×33 cm) baking dish.
6. Spread half of the pistachio mascarpone cream evenly over the ladyfingers.
7. Repeat with another layer of dipped ladyfingers, followed by the remaining pistachio mascarpone cream.
8. Cover the dish with plastic wrap and refrigerate for at least 6 hours, or preferably overnight, to allow the tiramisu to set and the flavors to meld.
9. Before serving, melt the dark chocolate. Drizzle the melted chocolate over the top of the tiramisu and sprinkle generously with the finely chopped pistachios.
**Details: **
Servings: 8-10
**Nutrition (per serving): **
Calories: 550
Protein: 9g
Carbs: 45g
Fat: 38g
**Notes: **
- Ensure the espresso is completely cool before dipping the ladyfingers to prevent them from becoming too soft.
- Do not over-soak the ladyfingers; a quick dip on each side is sufficient to moisten them without making them mushy.
- Chilling time is crucial for the tiramisu to set properly and for the flavors to fully develop.
- For the best pistachio flavor and color, use a high-quality pistachio paste.
So, there you have it: a magnificent no-bake pistachio tiramisu that promises to be a crown jewel in your dessert repertoire. This quick dessert is a testament to the fact that elegance and simplicity can coexist beautifully in the kitchen. Enjoy the applause, savor the flavors, and bask in the glory of creating something truly special without breaking a sweat! Happy dessert making!
Improving the Cooking Method
For this No-Bake Pistachio Tiramisu, timing is crucial. Ensure your strong brewed espresso cools completely before ladyfinger immersion. Whisking egg yolks and sugar to 160°F forms a stable base; let it cool fully. This sequence prevents curdling and ensures your creamy mascarpone layer sets beautifully for a quick dessert.
Decorate Your Dish with Your Personal Touch
Personalize this No-Bake Pistachio Tiramisu. Vary the strong brewed espresso with a lighter or darker roast. Adjust dark chocolate drizzle cocoa percentage. Lightly toast finely chopped pistachios before sprinkling; this enhances their nutty aroma, making your quick dessert uniquely yours.
Smart Tips for Storage and Reheating
For optimal texture, store your No-Bake Pistachio Tiramisu tightly covered in the refrigerator. This keeps ladyfingers moist and cream velvety. Crucially, add dark chocolate drizzle and finely chopped pistachios just before serving to ensure crispness and delightful textural contrast for this quick dessert.
Practical Chef Advice
My first No-Bake Pistachio Tiramisu vanished at a potluck. A reserved guest asked for the recipe! That immediate, genuine appreciation for this quick dessert was truly a charming and unforgettable moment.
Final Thoughts
From the first bite, this dessert transports you with its luxurious layers of espresso-kissed ladyfingers and velvety pistachio-infused mascarpone cream. It’s a surprisingly simple way to create a sophisticated treat that impresses every time. This easy no-bake pistachio delight allows you to achieve gourmet results without an oven, making it ideal for busy schedules or warm days. The blend of rich flavors and elegant presentation makes this a perfect conclusion to any meal. Don’t wait to experience the magic; gather your ingredients and whip up this delightful No-Bake Pistachio Tiramisu for a Quick Dessert that will surely become a new favorite.
Print
No-Bake Pistachio Tiramisu for a Quick Dessert
- Total Time: 45 minutes
- Yield: 8-10 1x
Description
This Pistachio Tiramisu offers a sophisticated twist on a classic Italian dessert. Layers of delicate ladyfingers are briefly steeped in rich espresso, then enveloped by a smooth, creamy mascarpone filling infused with the subtle, nutty essence of pistachio. The dessert is chilled to allow the flavors to meld and the textures to set, resulting in a harmonious balance of soft, moist cake and velvety cream. A generous topping of finely chopped pistachios and a delicate dark chocolate drizzle provides a pleasant textural contrast and a touch of elegant bitterness.
Ingredients
- 1 ½ cups strong brewed espresso or coffee, cooled
- 24–30 ladyfingers (savoiardi)
- 4 large egg yolks
- ¾ cup granulated sugar
- 16 ounces mascarpone cheese, softened
- ½ cup pistachio paste
- 1 teaspoon vanilla extract
- 1 ½ cups heavy cream, cold
- ½ cup shelled pistachios, finely chopped, for garnish
- 2 ounces dark chocolate, melted, for drizzle
Instructions
- Brew the espresso or strong coffee and set aside to cool completely.
- In a heatproof bowl set over a saucepan of simmering water (creating a double boiler), whisk together the egg yolks and granulated sugar. Continue whisking constantly for 8-10 minutes, until the mixture is pale yellow, thick, and reaches 160°F (71°C). Remove from heat and let cool to room temperature, stirring occasionally.
- In a large bowl, combine the cooled egg yolk mixture with the softened mascarpone cheese and pistachio paste. Mix gently until smooth and well combined. Stir in the vanilla extract.
- In a separate cold bowl, whip the cold heavy cream until stiff peaks form. Gently fold the whipped cream into the mascarpone-pistachio mixture until just combined, being careful not to deflate the cream.
- To assemble, quickly dip each ladyfinger into the cooled espresso, ensuring it is moistened but not soggy. Arrange a single layer of dipped ladyfingers in the bottom of a 9×13 inch (23×33 cm) baking dish.
- Spread half of the pistachio mascarpone cream evenly over the ladyfingers.
- Repeat with another layer of dipped ladyfingers, followed by the remaining pistachio mascarpone cream.
- Cover the dish with plastic wrap and refrigerate for at least 6 hours, or preferably overnight, to allow the tiramisu to set and the flavors to meld.
- Before serving, melt the dark chocolate. Drizzle the melted chocolate over the top of the tiramisu and sprinkle generously with the finely chopped pistachios.
Notes
Ensure the espresso is completely cool before dipping the ladyfingers to prevent them from becoming too soft.
Do not over-soak the ladyfingers; a quick dip on each side is sufficient to moisten them without making them mushy.
Chilling time is crucial for the tiramisu to set properly and for the flavors to fully develop.
For the best pistachio flavor and color, use a high-quality pistachio paste.
- Prep Time: 45 minutes
Nutrition
- Calories: 550
- Fat: 38g
- Carbohydrates: 45g
- Protein: 9g
FAQs
Why is it important for the espresso to be completely cool before dipping the ladyfingers?
According to the recipe notes, ensuring the espresso is completely cool before you dip the ladyfingers is crucial. If the espresso is warm or hot, the delicate ladyfingers will absorb too much liquid too quickly, making them overly soft or even mushy. A cool liquid allows for a controlled and even absorption, ensuring the ladyfingers are moistened just enough to provide that classic tender texture without compromising the structure of your dessert. This careful step contributes significantly to the overall balance and delightful mouthfeel of the dessert.
How long should I dip the ladyfingers to avoid them becoming too soft?
The recipe instructions emphasize a quick dip for each ladyfinger into the cooled espresso. The goal is to moisten them sufficiently without allowing them to become soggy or mushy. A brief dip on each side is generally enough. You want them to absorb some of the rich espresso flavor, but still retain their structure to support the creamy layers. Over-soaking is a common pitfall in tiramisu preparation, so be mindful of the speed to achieve the perfect texture in your delicious pistachio creation.
Why is a long chilling time necessary for this dessert?
Chilling time is absolutely critical for this particular no-bake dessert, as highlighted in the recipe notes. The instructions specify refrigerating for at least 6 hours, or preferably overnight. This extended period allows the different layers of the tiramisu to properly set and firm up, ensuring a stable structure that’s easy to slice and serve. More importantly, chilling gives the rich flavors—from the espresso-dipped ladyfingers to the pistachio mascarpone cream—ample time to meld and deepen, resulting in a more harmonious and delicious final product. Patience is key for the best taste experience.
Can I use a different type of cheese instead of mascarpone?
The recipe specifically calls for 16 ounces of softened mascarpone cheese as a key ingredient for the creamy filling. Mascarpone is a crucial component because it provides the signature rich, velvety texture and mild, slightly sweet flavor that defines this type of dessert. Its high fat content contributes to the luxurious mouthfeel of the pistachio mascarpone cream. Substituting it with other cheeses would alter the taste and consistency significantly, moving away from the intended profile of this specific Pistachio Tiramisu. For the best results and authentic flavor, it’s recommended to stick to mascarpone as indicated.
Is there a substitute for pistachio paste if I can’t find it?
The recipe specifically lists ½ cup of pistachio paste as an essential ingredient, noting that using a high-quality paste is important for the best pistachio flavor and color. The instructions direct you to combine the cooled egg yolk mixture with the mascarpone cheese and pistachio paste, integrating its subtle, nutty essence directly into the creamy filling. The recipe does not provide an alternative for pistachio paste, as it is foundational to the “Pistachio Tiramisu” identity. To achieve the intended taste and vibrant color of this specific dessert, it is crucial to use pistachio paste as outlined.