

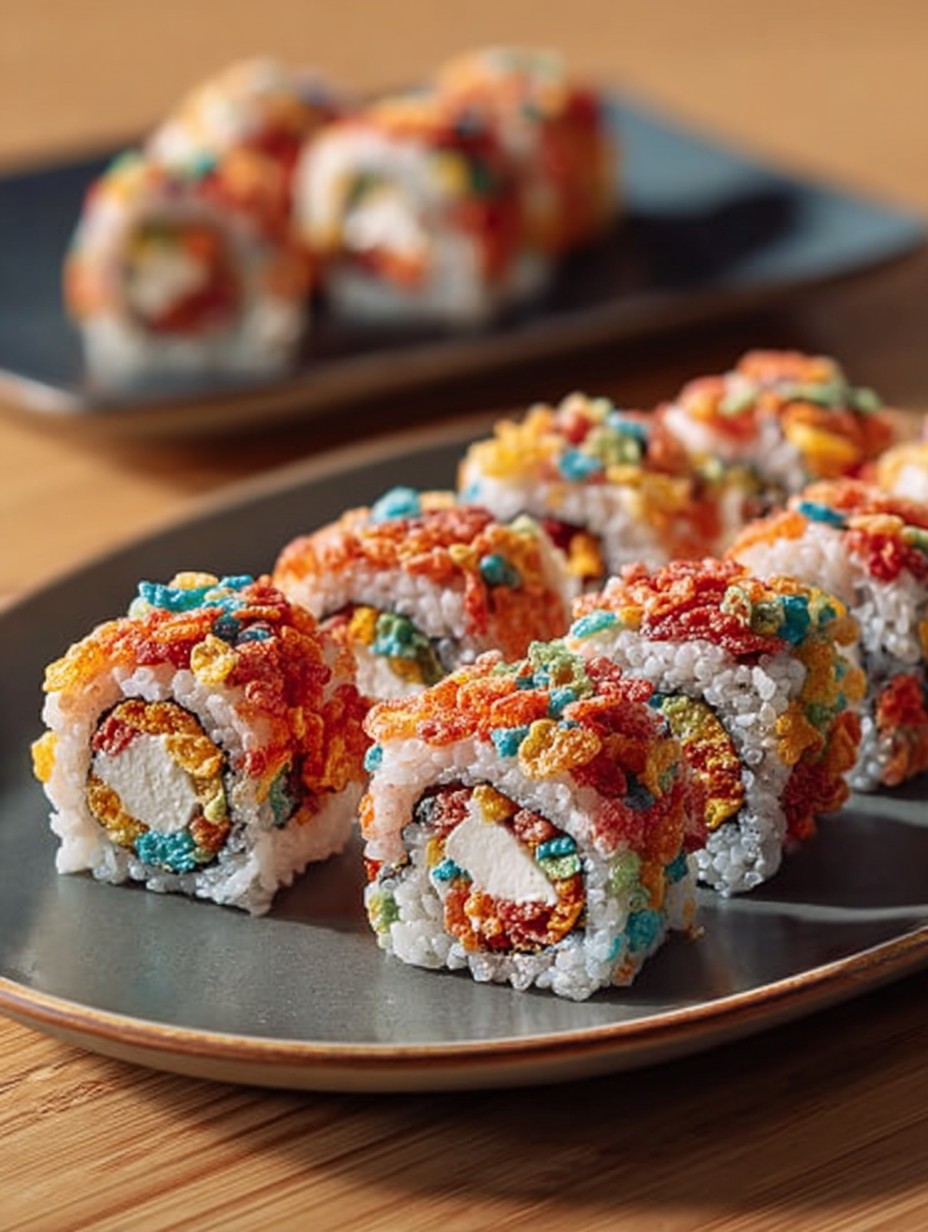
Imagine a bite that’s both wonderfully sweet and delightfully crisp, with a creamy filling nestled in soft rice, all bursting with vibrant color. These Sweet & Crunchy Fruity Pebbles Sushi Rolls are precisely that playful dream, a unique treat that’s as fun to make as it is to devour.
My love affair with breakfast cereal isn’t exactly a secret; I once tried to convince my family that cereal for dinner was a gourmet experience. So, when the idea of transforming a beloved sugary breakfast into a dazzling dessert sushi roll crossed my mind, I knew I had stumbled onto something truly magical, something worthy of sharing.
What Makes This Recipe Special
This recipe is a true standout, blending the unexpected into a wonderfully cohesive and utterly delicious dessert. It’s incredibly easy to prepare, making it a perfect project for home cooks of all skill levels, delivering big on flavor without requiring advanced culinary gymnastics. The unique combination of sweet sushi rice, creamy filling, and the unmistakable crunch of Fruity Pebbles creates a flavor profile that is both nostalgic and excitingly new. Visually, these rolls are a showstopper, a kaleidoscope of colors that will impress anyone you serve them to. Plus, their playful nature makes them surprisingly versatile, perfect for parties, brunches, or simply as a fun after-dinner treat.
Ingredients
Here’s what you need for this delicious dish:
All ingredients and quantities can be found directly in the recipe card below.
Step-by-Step Instructions
Simply follow these easy steps to prepare this delicious meal:
You’re about to embark on a culinary adventure that’s surprisingly simple and utterly rewarding. Don’t let the “sushi” part intimidate you; we’re essentially making rice treats with a delightful twist. Just gather your ingredients, put on your favorite tunes, and let’s roll!
Step 1: Master the Sushi Rice Foundation
The first step to any great sushi-inspired dish, sweet or savory, is perfectly cooked rice. Rinse 1 cup of sushi rice under cold water until the water runs clear. This removes excess starch, preventing your rice from becoming too gummy. Next, combine the rinsed rice and 1 1/4 cups of water in a saucepan. Bring this mixture to a boil, then immediately reduce the heat to low. Cover the saucepan tightly and simmer for precisely 15 minutes, or until all the water has been completely absorbed. Once cooked, remove the pan from the heat and let it stand, still covered, for 10 minutes. This crucial resting period allows the rice to steam further and achieve its ideal texture.
Step 2: Infuse the Rice with Sweetness
Now for the magic touch that transforms our humble rice into a dessert-ready base. Transfer the cooked rice to a large bowl, spreading it out slightly to cool. In a small separate bowl, whisk together 2 tablespoons of rice vinegar, 1 tablespoon of granulated sugar, and 1/2 teaspoon of salt. Keep whisking until the sugar completely dissolves, creating a clear, fragrant liquid. Gently fold this vinegar mixture into the rice, using a cutting motion with a spatula or spoon to avoid mashing the grains. The goal is to distribute the seasoning evenly without overworking the rice. Let the seasoned rice cool completely to room temperature before proceeding. This complete cooling is one of the most important tips for best results, ensuring the rolls hold their shape.
Step 3: Create the Creamy Dream Filling
While your rice is chilling out, let’s whip up the dreamy, colorful filling. In a medium bowl, take your 8 ounces of softened cream cheese and beat it together with 1/4 cup of powdered sugar (or more, to suit your sweet tooth!) and 1/2 teaspoon of vanilla extract. Beat until the mixture is beautifully smooth and wonderfully creamy, with no lumps in sight. Then, with gentle hands, fold in 1/2 cup of Fruity Pebbles cereal. This gives our filling a delightful textural contrast and an extra burst of fruity flavor.
Step 4: Set the Stage for Rolling
This step is all about getting your rolling station ready for action. Lay a bamboo sushi mat on a clean, flat surface. Bamboo mats provide the perfect grip and flexibility for forming tight, professional-looking rolls. To keep things neat and prevent sticking, cover the entire mat with plastic wrap. This is your non-stick shield! Finally, place one sheet of nori seaweed directly on top of the plastic wrap, centered on your mat.
Step 5: Spread the Sweet Rice Base
Time to get your hands a little wet – literally! Moisten your hands with water. This simple trick prevents the sticky sushi rice from clinging to your fingers, making it much easier to handle. Scoop about half of your now completely cooled sushi rice and spread it evenly over the nori sheet, leaving a 1/2-inch border along the top edge of the nori. The coolness of the rice is key here; chilling the assembled rolls briefly helps them firm up, making slicing easier and cleaner later.
Step 6: Flip and Fill with Fruity Goodness
Now for a little sushi magic! Carefully flip the nori sheet so that the rice side is now facing down on your plastic-covered bamboo mat. This “rice-on-the-outside” technique is what gives these Sweet & Crunchy Fruity Pebbles Sushi Rolls their signature vibrant coating. Arrange half of the creamy Fruity Pebbles filling in a neat line across the center of the nori, running parallel to the edge closest to you.
Step 7: Roll It Up Tight
This is where your sushi-making skills come into play. Using the bamboo mat, carefully lift the bottom edge of the mat and roll the sushi tightly from the bottom edge upwards. As you roll, gently press down to form a compact, cylindrical log. The plastic wrap will help you maintain a tight shape and prevent any filling from escaping. Don’t be afraid to give it a good, firm press as you go to ensure a beautifully cohesive roll.
Step 8: The Grand Cereal Coating
This is where our ‘Crunchy’ element truly shines! Spread a generous amount of extra Fruity Pebbles cereal on a flat plate. Once your sushi log is perfectly rolled, gently transfer it to the plate of cereal. Roll the sushi log in the cereal, pressing gently but firmly to ensure the vibrant cereal adheres completely and evenly to the rice. You want every inch covered for maximum crunch and color!
Step 9: Chill, Slice, and Serve Your Creation
Repeat the entire rolling process (steps 4 through 8) for the second roll. Once both rolls are coated, transfer them to the refrigerator and chill for at least 15-20 minutes. This allows them to firm up, making slicing much easier and cleaner. When you’re ready to serve, grab a very sharp knife and moisten it slightly with water. Keeping your knife slightly wet while slicing is a fantastic tip to prevent sticking and achieve neat, precise cuts. Slice each roll into 6-8 pieces. Garnish with a little extra cereal or a drizzle of something sweet if you like, and serve immediately to enjoy the fantastic texture and fruity explosion!
These Sweet & Crunchy Fruity Pebbles Sushi Rolls are perfect for sharing, creating 2 rolls which yield about 12-16 delightful pieces. Each serving is approximately 380 calories, with 9g of protein, 65g of carbs, and 12g of fat. It’s a wonderfully unique treat that balances indulgence with surprising nutritional value for a dessert.
There you have it! A recipe that’s sure to bring smiles, spark conversation, and satisfy any sweet tooth with its unforgettable combination of soft, creamy, and wonderfully crunchy textures. Go ahead, dive into the colorful world of dessert sushi, and enjoy every single playful bite.
Improving the Cooking Method
For those delightful Sweet & Crunchy Fruity Pebbles Sushi Rolls, ensure your seasoned rice is completely cooled before even thinking about adding the filling. This prevents a sticky mess. When making the cream cheese filling, gently fold in the cereal to maintain its vibrant crunch and texture.
Decorate Your Dish with Your Personal Touch
Want to personalize these sweet sushi rolls? Instead of vanilla extract, consider a touch of almond or lemon extract for a brighter flavor in the cream cheese filling. For the signature coating, while Fruity Pebbles are fantastic, experiment with other colorful, crunchy breakfast cereals to achieve a different twist on this unique dessert.
Smart Tips for Storage and Reheating
To keep your delightful Sweet & Crunchy Fruity Pebbles Sushi Rolls at their best, store them in an airtight container in the refrigerator for up to two days. For optimal crunch, serve soon after slicing. If preparing ahead, consider coating with extra cereal just before serving to maximize that satisfying crispness.
Practical Chef Advice
I once surprised my niece with these vibrant Sweet & Crunchy Fruity Pebbles Sushi Rolls for her birthday. Her eyes lit up – pure joy in every colorful, crunchy bite. A sweet memory I’ll always cherish.
Final Thoughts
This playful dessert sushi offers a truly vibrant and unique treat. You’ll adore the delightful contrast of soft, sweetened rice, a smooth, creamy filling, and that irresistible crunch from the cereal coating. It’s a visually appealing and incredibly enjoyable snack that brings a smile with every bite. Why wait? Dive into this delightful creation; prepare your own batch of these fun, sweet, and crunchy cereal rolls today and experience the magic for yourself!
Print
Sweet & Crunchy Fruity Pebbles Sushi Rolls
- Total Time: 40 minutes
- Yield: 2 rolls (12-16 pieces) 1x
Description
This playful dessert sushi offers a vibrant and unique culinary experience. Sweetened sushi rice is rolled with a creamy, colorful cereal-infused filling, then coated generously with crisp Fruity Pebbles cereal. Each bite delivers a delightful contrast of soft, sweet rice, smooth creaminess, and a satisfying, fruity crunch, making it a visually appealing and enjoyable treat.
Ingredients
- 1 cup uncooked sushi rice
- 1 1/4 cups water
- 2 tablespoons rice vinegar
- 1 tablespoon granulated sugar
- 1/2 teaspoon salt
- 8 ounces cream cheese, softened
- 1/4 cup powdered sugar, or to taste
- 1/2 teaspoon vanilla extract
- 1/2 cup Fruity Pebbles cereal, plus extra for coating
- 2 sheets nori seaweed
- Plastic wrap
Instructions
- **Prepare Sushi Rice:** Rinse sushi rice under cold water until the water runs clear. Combine the rinsed rice and water in a saucepan. Bring to a boil, then reduce heat to low, cover, and simmer for 15 minutes, or until all water is absorbed. Remove from heat and let stand, covered, for 10 minutes.
- **Season Rice:** Transfer the cooked rice to a large bowl. In a small bowl, whisk together rice vinegar, granulated sugar, and salt until the sugar dissolves. Gently fold the vinegar mixture into the rice. Let the seasoned rice cool completely to room temperature.
- **Prepare Cream Cheese Filling:** In a medium bowl, beat the softened cream cheese with powdered sugar and vanilla extract until smooth and creamy. Gently fold in 1/2 cup of Fruity Pebbles cereal.
- **Assemble Sushi Rolls:** Lay a bamboo sushi mat on a clean surface. Cover the mat with plastic wrap. Place one sheet of nori seaweed on the plastic wrap.
- **Add Rice:** Moisten your hands with water. Spread about half of the cooled sushi rice evenly over the nori, leaving a 1/2-inch border at the top edge.
- **Flip and Fill:** Carefully flip the nori sheet so the rice side is now facing down on the plastic-covered mat. Arrange half of the cream cheese filling in a line across the center of the nori.
- **Roll the Sushi:** Using the bamboo mat, carefully roll the sushi tightly from the bottom edge upwards, pressing gently to form a compact log.
- **Coat with Cereal:** Spread a generous amount of Fruity Pebbles cereal on a flat plate. Roll the sushi log in the cereal, pressing gently to ensure it adheres completely to the rice.
- **Slice and Serve:** Repeat the process for the second roll. Chill the rolls for at least 15-20 minutes to allow them to firm up. Using a very sharp, slightly wet knife, slice each roll into 6-8 pieces. Serve immediately.
Notes
For best results, ensure your sushi rice is completely cooled before you begin rolling.
Chilling the assembled rolls briefly helps them firm up, making slicing easier and cleaner.
Keep your knife slightly wet while slicing to prevent sticking and achieve neat, precise cuts.
Adjust the amount of powdered sugar in the cream cheese filling to suit your preferred sweetness level.
- Prep Time: 40 minutes
- Cook Time: 0 minutes
Nutrition
- Calories: 380 per serving
- Fat: 12g
- Carbohydrates: 65g
- Protein: 9g
FAQs
Why is it important to cool the sushi rice completely before assembling the rolls?
It is crucial to let the sushi rice cool entirely to room temperature after seasoning it with the vinegar mixture. This step, mentioned in the notes for best results, prevents the nori seaweed from becoming soggy or tearing when you spread the rice. Moreover, properly cooled rice is much easier to handle, allowing you to spread it evenly and roll the dessert sushi effectively without it sticking excessively to your hands or the plastic wrap. This ensures the structural integrity and ideal texture of your sweet and crunchy cereal rolls.
What ingredients are used to create the creamy filling for these delightful dessert rolls?
The delicious and colorful creamy filling for these Fruity Pebbles sushi rolls is made from a simple yet irresistible combination of ingredients. You will need 8 ounces of softened cream cheese, which provides a rich and smooth base. To sweeten it, 1/4 cup of powdered sugar is added, with the option to adjust it to your taste. A touch of 1/2 teaspoon of vanilla extract enhances the flavor, and finally, 1/2 cup of Fruity Pebbles cereal is gently folded in, adding a delightful crunch and vibrant color to the center of each roll.
How can I ensure my Sweet & Crunchy Fruity Pebbles Sushi Rolls are easy to slice neatly?
To achieve clean, precise cuts for your sweet and crunchy cereal sushi rolls, there are a couple of key steps to follow. First, after assembling the rolls and coating them with cereal, it’s vital to chill them for at least 15-20 minutes. This brief chilling period helps the rolls firm up, making them much easier to handle and less likely to fall apart when sliced. Secondly, when it’s time to cut, use a very sharp knife. Keeping the knife slightly wet as you slice will prevent the rice and filling from sticking, ensuring each piece looks perfect.
Is it possible to adjust the sweetness of the cream cheese filling in this recipe?
Yes, absolutely! The recipe provides flexibility for you to tailor the sweetness of the cream cheese filling to your personal preference. When preparing the cream cheese mixture, you begin with 1/4 cup of powdered sugar. However, the instructions explicitly state “or to taste,” allowing you to add more if you prefer a sweeter profile, or less if you like a more subtle sweetness. This customization ensures your delightful sweet sushi rolls are perfectly suited to your palate, making them even more enjoyable.