
Introduction
I still remember the first time I made these Cheesy Garlic Chicken Wraps. It was a rainy afternoon, and I was craving something warm, cheesy, and comforting—but quick. I had some leftover cooked chicken in the fridge and a few wraps I’d bought for a different recipe. As I stared at the garlic bulbs on my counter and the cheese in my fridge, inspiration struck. A few minutes later, the kitchen was filled with the smell of melted cheese and garlic, and I had a golden, crispy wrap in my hands. Ever since then, this has become one of my go-to meals whenever I want something fast and satisfying.
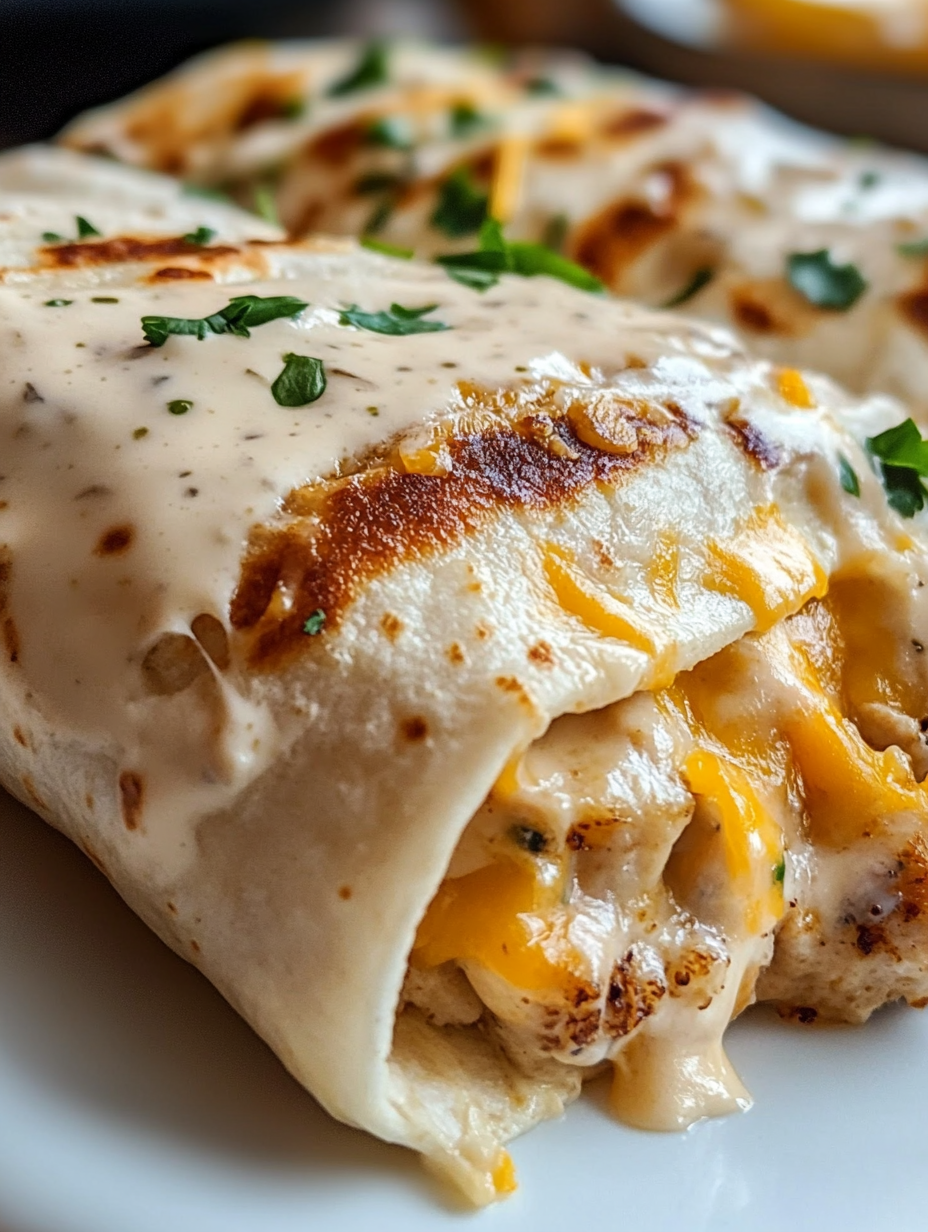
These wraps have a crispy golden crust, gooey cheese inside, tender chicken seasoned just right, and a rich garlic butter flavor that makes every bite unforgettable. Whether I’m feeding my family on a busy weeknight or need something crowd-pleasing for lunch with friends, they never disappoint.
Why You’ll Love This Recipe:
Versatile
You can serve these wraps for lunch, dinner, or as a hearty snack. They’re easy to adapt to whatever ingredients you have on hand.
Budget-Friendly
This recipe uses common pantry staples like tortillas, garlic, and cheese. Leftover chicken works perfectly, which saves money and prevents food waste.
Ingredients for the Recipe
-
2 cups cooked chicken breast, shredded or chopped (or rotisserie chicken)
-
1 tablespoon olive oil
-
3 garlic cloves, minced
-
Salt and pepper to taste
-
1/2 teaspoon paprika
-
1/2 teaspoon dried oregano
-
1/2 teaspoon onion powder
-
1 cup shredded mozzarella cheese
-
1/2 cup shredded cheddar cheese
-
2 tablespoons cream cheese (optional for extra creaminess)
-
4 large flour tortillas or wraps
-
2 tablespoons butter (for toasting wraps)
-
1 tablespoon chopped parsley (optional, for garnish)
You probably already have most of these ingredients in your kitchen. And if not, they’re easy to find in any grocery store.
How to Make This Recipe
These wraps are quick to prepare and incredibly satisfying. With only a few basic steps and simple ingredients, you’ll have a golden, crispy, cheesy wrap in under 30 minutes. Here’s how I make them:
Step-by-Step Instructions
Step 1: Prepare the Chicken Filling
If your chicken is not yet cooked, start by seasoning raw chicken breast with salt, pepper, paprika, and a little olive oil. Cook it in a skillet over medium heat for about 5–6 minutes per side until fully cooked, then shred or chop it.
If you’re using leftover or rotisserie chicken, simply shred it into bite-sized pieces and set it aside.
Step 2: Make the Garlic Mixture
In a skillet, heat 1 tablespoon of olive oil over medium heat. Add the minced garlic and sauté for 30–60 seconds until fragrant. Do not let it brown—it should smell amazing and look golden.
Add the shredded chicken to the skillet. Sprinkle in paprika, oregano, onion powder, salt, and pepper. Stir to combine everything evenly. Cook for 2–3 more minutes until the chicken is heated through and well-seasoned.
If using cream cheese, stir in 2 tablespoons at this stage for a creamy, richer filling. It will help bind the chicken and add a smooth texture.
Remove from heat and let the mixture cool for a few minutes while you prep the wraps.
Step 3: Assemble the Wraps
Lay out your tortillas on a clean surface. On one half of each tortilla, layer 1/4 of the chicken mixture. Top with about 1/4 cup mozzarella and 2 tablespoons cheddar per wrap. The cheese will melt and hold everything together.
Fold the wrap tightly like a burrito—fold in the sides first, then roll it up from the bottom. Make sure it’s sealed tightly so nothing spills out while cooking.
Step 4: Toast the Wraps
In a large skillet, melt 1 tablespoon of butter over medium heat. Once melted, place two wraps seam-side down into the pan. Press them slightly with a spatula for even browning.
Toast for 2–3 minutes per side until the wraps are golden and crispy. You want the cheese to melt and the outside to become beautifully crisp. Repeat with the remaining wraps, adding more butter as needed.
Alternatively, you can use a panini press or air fryer for extra convenience.
Step 5: Garnish and Serve
Remove the wraps from the pan and let them rest for one minute before slicing. Garnish with chopped parsley if desired. Cut each wrap in half diagonally and serve hot.
I love serving these with a side of sour cream, garlic yogurt dip, or a simple salad. But they’re also delicious on their own.
Quick and Easy
This recipe takes under 30 minutes from start to finish. There’s no need to wait for dough to rise, and cleanup is minimal. You can use precooked chicken or leftovers to save even more time. Plus, these wraps are easy to prep ahead—just assemble and toast when you’re ready to eat.
Customizable
These wraps are endlessly customizable. You can:
-
Add vegetables like spinach, bell peppers, or mushrooms.
-
Use other cheeses like gouda or pepper jack.
-
Add a bit of chili powder or hot sauce for a spicy kick.
-
Swap the chicken for turkey or even beef, depending on your preference.
You can even make them gluten-free by using gluten-free wraps. And if you want a low-carb version, try using large lettuce leaves or low-carb tortillas.
Perfect for Guests
These wraps are a great crowd-pleaser. They’re hand-held, mess-free, and look great when sliced and stacked on a platter. Whether you’re hosting a casual lunch or need something tasty for game night, they’re always a hit.
You can make a large batch and keep them warm in the oven until guests arrive. Or let guests customize their own wraps with a “wrap bar” filled with different fillings and toppings.
They’re kid-friendly, too. The mild flavors, gooey cheese, and soft texture make them a great option for picky eaters.
FAQs (Frequently Asked Questions)
Can I prepare these wraps in advance?
Yes, you can assemble the wraps ahead of time and store them in the refrigerator for up to 24 hours. Toast them just before serving for the best texture.
How do I store leftovers?
Wrap the cooled wraps tightly in foil or place them in an airtight container. Store in the refrigerator for up to 3 days. Reheat in a skillet or oven to keep them crispy.
Can I freeze these wraps?
Yes. Wrap each one tightly in plastic wrap, then foil, and freeze for up to one month. Thaw in the fridge overnight and reheat in the oven or air fryer.
What other fillings can I use?
You can add cooked vegetables, turkey bacon, beef strips, or substitute the cheeses for other meltable options like provolone or gouda.
Are these wraps good for lunchboxes?
Yes. Let the wrap cool completely before wrapping it in foil or wax paper. They’re great warm or at room temperature.
How do I keep the wrap from getting soggy?
Avoid overfilling, and make sure any added veggies are dry. Toasting the wrap until golden also helps seal in moisture and flavor.